When it comes to bathroom and kitchen design, the backsplash is often seen as a practical element meant to protect your walls from splashes and stains. However, in recent years, the concept of a vanity backsplash has taken the interior design world by storm.
A vanity backsplash is more than just a functional necessity; it’s an opportunity to infuse your space with personality, style, and a touch of luxury. Let’s explore the concept of a vanity backsplash, its various design possibilities, and how it can transform your bathroom or kitchen into a truly unique and engaging space.
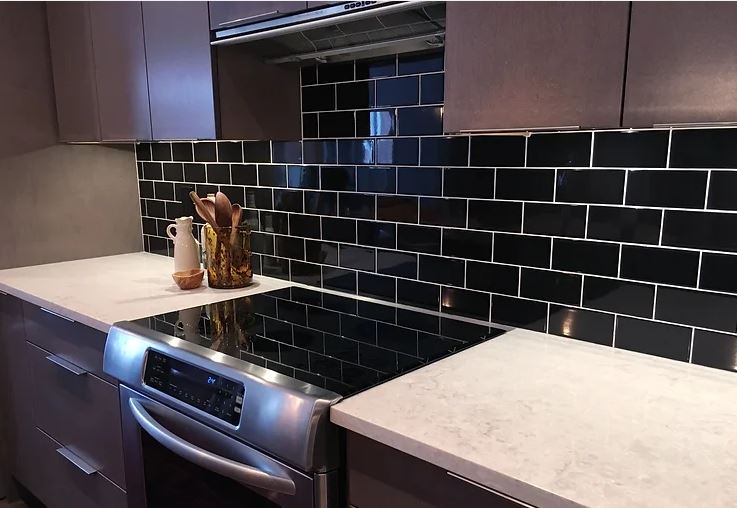
Elevating Your Kitchen with a Vanity Backsplash
A vanity backsplash is a finishing touch for your bathroom remodel that can add style, functionality, and value to your home. It can also protect your walls from water damage and make your bathroom easier to clean. It is a smart investment for any bathroom. It can help to protect the wall, improve the overall appearance of the room, and even increase the value of your home.
A vanity backsplash is important for two main reasons:
- Protection: It protects the wall behind the vanity from water damage, mold, and mildew. This is especially important in areas where the wall is more likely to get wet, such as around the sink and faucet.
- Aesthetics: A backsplash can add a touch of style and sophistication to your bathroom. It can also be used to tie together different elements of the room’s design, such as the countertop, flooring, and cabinetry.
Here are some specific benefits of having a vanity backsplash:
- Reduces the risk of mold and mildew: Water can easily seep into drywall and other porous materials, creating the perfect breeding ground for mold and mildew. A backsplash creates a barrier between the wall and the water, helping to keep your bathroom clean and healthy.
- Protects the wall from damage: Water splashes, toothpaste splatters, and other accidents can damage the wall behind your vanity. A backsplash provides a durable surface that is easy to clean and maintain.
- Adds visual interest: A backsplash can add a touch of personality and style to your bathroom. It can also be used to create a focal point or to highlight other features of the room, such as the sink or faucet.
- Increases the value of your home: A well-designed backsplash can make your bathroom look more updated and sophisticated. This can increase the value of your home, especially if you are planning to sell in the near future.
In addition to the above, a vanity backsplash can also:
- Help to conceal plumbing and electrical fixtures
- Provide a convenient place to hang towels or other bathroom accessories
- Make it easier to clean the wall behind the vanity
If you are considering adding a vanity backsplash to your bathroom, there are a wide variety of materials and styles to choose from. Some popular options include ceramic tile, glass tile, natural stone, and metal. You can also find backsplashes in a variety of colors and patterns to match your existing décor.
Choosing the right vanity backsplash for your kitchen and bathroom
Choosing the right vanity backsplash can significantly impact the overall look and functionality of your spaces. Backsplashes serve both aesthetic and practical purposes, as they protect walls from water damage, grease, and stains while also adding a decorative element to the room.

Here are some steps to help you choose the right vanity backsplash for your kitchen and bathroom remodel:
Think about the overall style and design of your kitchen or bathroom. Do you want a modern, traditional, rustic, or contemporary look? Your choice of backsplash should complement the existing decor and style.
Backsplashes can be made from various materials, each with its own pros and cons. Common materials include:
- Tile: Ceramic, porcelain, glass, and natural stone tiles are popular choices. They come in various shapes, sizes, and colors, offering versatility in design.
- Glass: Glass backsplashes create a sleek and modern appearance. They are easy to clean and reflect light well.
- Stone: Natural stones like marble, granite, or travertine can provide an elegant and timeless look but may require more maintenance.
- Metal: Stainless steel, copper, or aluminum backsplashes can add an industrial or contemporary touch.
- Laminate or Solid Surface: These materials are easy to clean and come in a wide range of patterns and colors.
Think About Maintenance
Some materials require more maintenance than others. For example, natural stone may need regular sealing, while glass is easy to clean but can show fingerprints. Choose a material that suits your maintenance preferences. Get creative with the design of your backsplash. Consider using different tile patterns, mosaic designs, or even a unique layout like a herringbone or subway pattern.
Select a color scheme for your backsplash that harmonizes with the overall color palette of the room. You can opt for a complementary, contrasting, or monochromatic color scheme. Lighting can affect the appearance of your backsplash. Under-cabinet lighting can highlight the backsplash and create a visually appealing focal point.
Sealing and resealing are important maintenance tasks for various surfaces and materials around your home, including countertops, tiles, grout, and natural stone. Proper sealing helps protect these surfaces from stains, water damage, and wear and tear. Here are some tips for sealing and resealing:
General Sealing Tips:
- Choose the Right Sealer: Different surfaces require different types of sealers. Make sure to select the appropriate sealer for the material you are sealing. For example, there are sealers specifically designed for natural stone, grout, concrete, and more.
- Clean the Surface Thoroughly: Before sealing, ensure that the surface is clean and free of dirt, dust, grease, and any previous coatings or residues. Use appropriate cleaning products and techniques for the specific material.
- Test in an Inconspicuous Area: Perform a small test in an inconspicuous area to make sure the sealer works well with your surface and achieves the desired result. This helps avoid any surprises on the visible areas.
- Follow Manufacturer’s Instructions: Always read and follow the manufacturer’s instructions for the sealer you are using. Each product may have specific application and curing requirements.
- Use Appropriate Tools: Use the right tools for applying the sealer. For larger areas, you may need a paintbrush, roller, or sprayer. Smaller or more intricate areas may require a sponge or cloth.
- Apply in Thin, Even Coats: Apply the sealer in thin, even coats to avoid streaks, drips, or uneven coverage. Multiple thin coats are often better than one thick coat.
- Allow Adequate Drying Time: Give the sealer sufficient time to dry and cure. This typically takes several hours to a day or more, depending on the product. Avoid using the sealed surface during this time.
Resealing Tips:
- Know When to Reseal: The frequency of resealing depends on the type of surface and the wear it receives. Some surfaces may need resealing every year, while others can go several years between applications. Check for signs of wear and water absorption to determine when to reseal.
- Clean the Surface First: Before resealing, clean the surface thoroughly to remove any dirt, stains, or residues that may have accumulated since the last sealing.
- Remove Old Sealer if Necessary: If the previous sealer has worn off or is no longer effective, you may need to strip it off before applying a new one. Follow the manufacturer’s instructions for sealer removal products.
- Apply a Fresh Coat: Follow the same application process as when you initially sealed the surface. Apply a fresh, even coat of sealer and allow it to dry and cure as directed.
- Keep Records: Maintain a record of when you last sealed or resealed a particular surface. This will help you establish a resealing schedule and ensure that you don’t miss important maintenance tasks.
Proper sealing and resealing can extend the life and beauty of your surfaces while protecting them from damage. Following these tips and manufacturer recommendations will help you achieve the best results and maintain the integrity of your home’s surfaces.
Types of Vanity Backsplash Materials
- Tile (ceramic, porcelain, glass, natural stone, etc.)
- Metal (stainless steel, copper, bronze, etc.)
- Mirror
- Wood
- Solid surface (quartz, granite, etc.)
Popular Vanity Backsplash Designs
- Subway tile
- Herringbone tile
- Penny tile
- Mosaic tile
- Geometric tile
- Waterjet tile
- Metal backsplash
- Mirror backsplash
- Wood backsplash
- Solid surface backsplash
If you’re uncertain about your choices or the installation process, consult with a professional designer or contractor. They can provide valuable insights and ensure a successful remodel.
In conclusion
A vanity backsplash can elevate your space in a number of ways:
- Add visual interest and a pop of color, pattern, or texture to your bathroom or kitchen, making it more visually appealing.
- Create a focal point and draw attention to your vanity area. Making it the centerpiece of your room.
- Upgrade your style to a more modern or sophisticated feel.
- Protect your walls and prevent water and other liquids from splashing onto your walls, which can help to prevent damage and make your space easier to clean.
Don’t be afraid to get creative with your backsplash design. There are many different materials and patterns to choose from, so you can create a backsplash that is truly unique and reflects your personal style.
With a little planning, you can use a vanity backsplash to elevate your space and create a bathroom or kitchen that you love.
Remember that your choice of vanity backsplash should not only enhance the aesthetics of your kitchen or bathroom but also meet your practical needs. By carefully considering your options and following these steps, you can select the right backsplash that complements your space and fits your preferences.
Pingback: Woodland Nursery Decor VS Winnie the Pooh Nursery Decor - Amastyles
Pingback: The Beauty of Granite Backsplash: Enhance Your Kitchen with Elegance - Amastyles
Comments are closed.